Candor Threads’ Favorite Holiday Recipes
It’s the most wonderful time of the year and all of us at Candor Threads are looking forward to gathering with our family and friends for good conversation and fabulous food! Just like custom apparel, good recipes can connect people, evoke warm and fuzzy feelings, and serve as an anchor for creating lasting memories. Whether they came from family traditions or a quick internet search, here are some of our team’s tried-and-true favorite recipes!
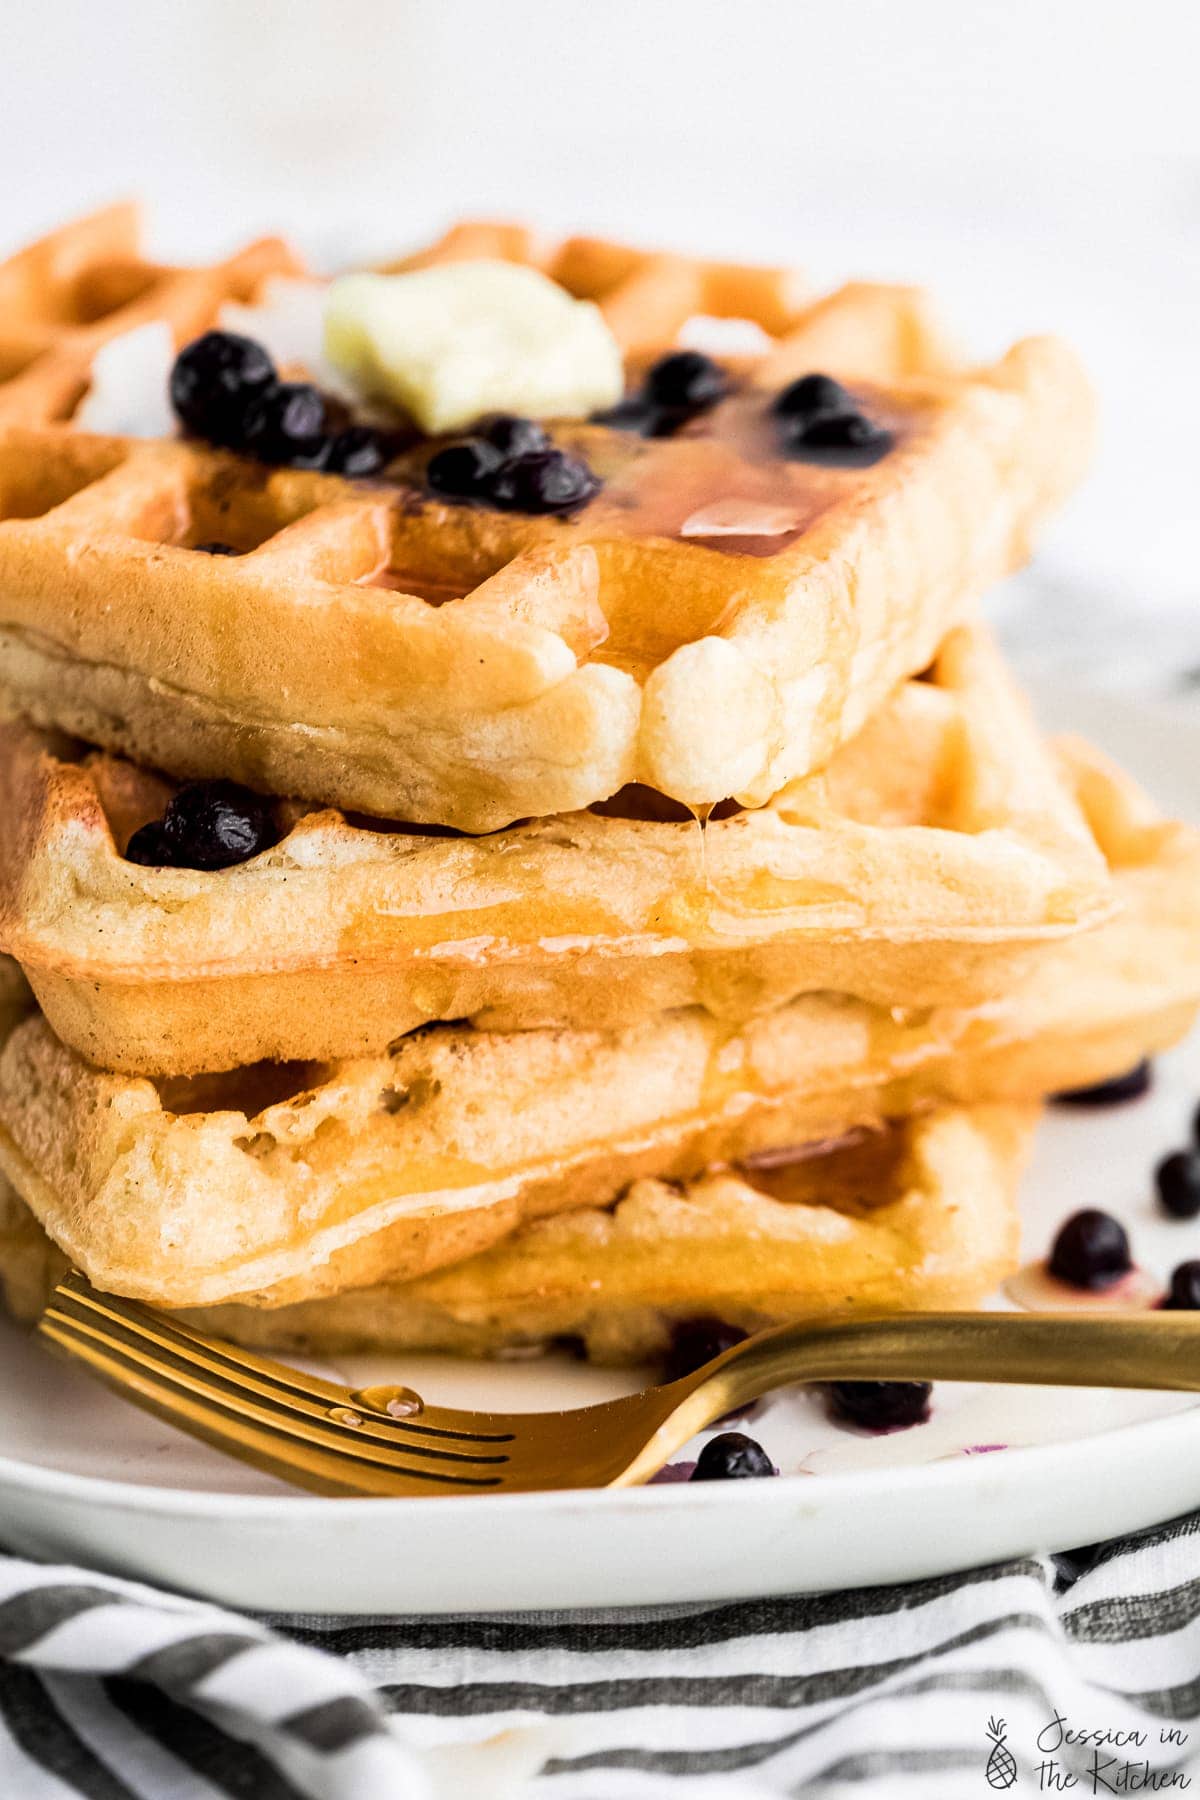
Jinna’s Holiday Breakfast Waffles
Jinna is our team vegan! We can always count on her for the very best recipes that don’t involve any products from our furry/feathered friends. This recipe was taken from Jessica in the kitchen and enjoyed by Jinna.
Ingredients:
- 1 1/2 cups unsweetened soy or coconut milk, or any vegan milk
- 2 teaspoons apple cider vinegar
- 2 cups all-purpose flour, (240g)
- 1 tablespoon baking powder
- 1/2 teaspoon sea salt
- 1 tablespoon brown sugar or maple syrup
- 1/4 cup melted coconut oil or melted vegan butter
- 1/2 teaspoon vanilla extract
- fruits to serve or a dollop of vegan whipped cream
Instructions:
-
Mix the nut milk, vanilla extract, and lemon juice or ACV together in a small bowl/measuring cup. Set aside for about 5 minutes – this will make the vegan buttermilk.
-
In a large bowl, sift the flour, baking powder, and salt. The sifting really helps to make the waffles fluffy.
-
Add the sugar, melted butter/oil, and buttermilk mixture into the dry ingredients. Using a spatula, gently mix the batter until JUST combined. It’s okay (and normal) to have some lumps. The batter should be thick and scoopable.
-
Turn on and preheat your waffle maker according to which doneness level you prefer. I set mine to about medium because I like mine crisp and golden but also very fluffy.
-
Using a ½ cup (125mL) measuring cup, scoop out some batter and pour/spread into the middle of the greased waffle maker. You don’t need to push it to the edges. Close and let cook until the steam has COMPLETELY stopped from the waffle maker. Don’t open it before the steam is finished!
-
Remove each waffle and place on a baking sheet in your oven or toaster oven on “warm” or 200F/95C to keep warm and crispy until finished with the entire batter. Continue with the rest of the batter.
-
Serve with your favorite toppings like blueberry sauce and enjoy!
Monique’s Delectable Cranberry Sauce
Monique has been bringing this cranberry sauce to family gatherings for the past 20 years. The orange juice offsets the tangy flavor of the cranberries for a sweet side dish your whole family will love. (Due to the absence of a photo, we have used a similar photo from Modern Honey.)
Ingredients:
- 1 cup of granulated sugar
- 1 cup of water
- 4 cups (12oz package) of fresh or frozen cranberries
- Orange zest to taste (the more the better, really)
- 2/3 cup no-pulp orange juice
- 1 can (14 oz) of jellied cranberry sauce
- Cinnamon to taste
Instructions:
-
Wash the fresh/frozen cranberries
-
In a saucepan, bring water and sugar to a boil. Stir until the sugar is fully dissolved.
-
Add cranberries and return to boil.
-
Reduce heat and simmer for 10 minutes, or until cranberries burst.
-
Add all remaining ingredients.
-
Remove from heat and cool completely to room temperature.
-
Chill in the fridge. The mixture will thicken as it cools.
- When ready to serve, top the mixture with more orange zest for a Pinterest-perfect side dish!
April’s Amazing Crockpot Green Beans
April loves making these green beans for her family and friends. This recipe has 6 easy ingredients and cooking them in the crockpot makes for an easy, fairly hands-off side dish.
Ingredients:
- 1 – 24 oz bag of frozen green beans
- 2 – 32oz containers of vegetable broth/stock
- 1/2 large vidalia onion
- 2-4 tbsp liquid smoke
- 3-4 tbsp toasted sesame oil
- 1-2 tbsp salt
Instructions:
-
Dice or slice your onions, whichever is more clever for your crowd
-
Place green beans and onions in a crockpot and cover with the broth
-
Add toasted sesame oil, Liquid Smoke, and salt to taste
-
Cook on high for 6-8 hours until beans are soft and tender (April says 8 hours is best if you have the time to spare)
-
Strain the beans and onions out, and if you like, save the broth for making extra-flavorful mashed potatoes, gravy, or dressing!
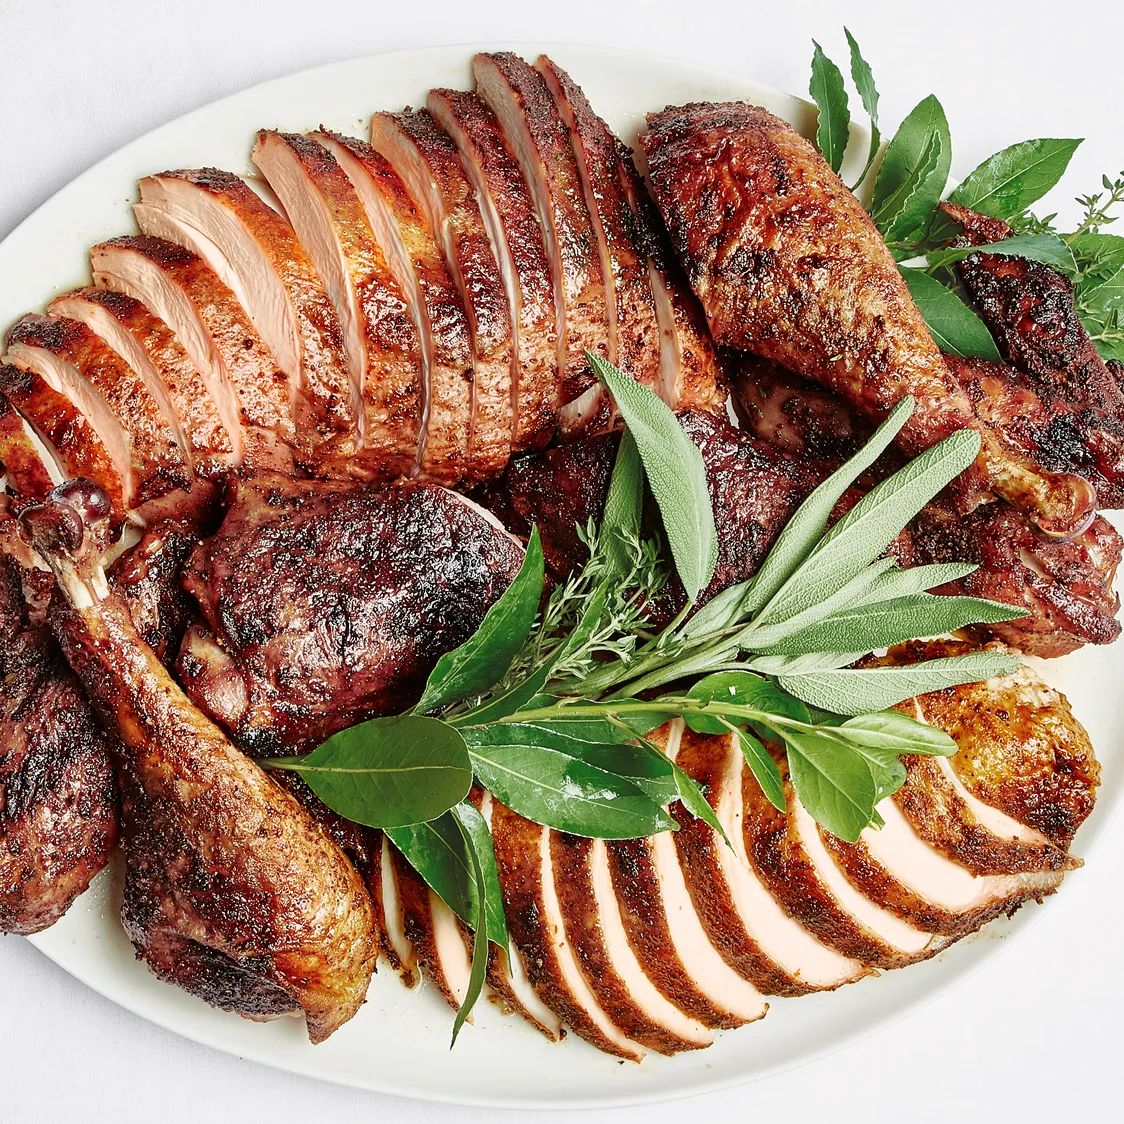
Kristine’s Hubby’s To-Die-For Turkey
Kristine has the luxury of a husband who loves to cook! He found this recipe from Bon Appetit and has been wowing their dinner guests ever since. If you’re looking for a blog about programming and cooking, be sure to check out his blog: Mager.co.
Ingredients:
Turkey:
- 12-14 lb turkey, neck and giblets removed
Dry Rub:
- 2 Tbsp. whole black peppercorns
- 2 Tbsp. of pink or black peppercorns
- 1/2 cup of Diamond Crystal or 1/4 cup 1-1/2 tsp. Morton Kosher Salt
- 2 Tbsp. garlic powder
- 2 Tbsp. onion powder
- 1 Tbsp light brown sugar
- 1 Tbsp. smoked paprika
The Glaze:
- 1 small handful of hardy herbs (such as sage, rosemary, bay leaves, and/or thyme)
- 2 garlic cloves
- 2x 1-inch strips of orange zest
- 1/3 cup of soy sauce
- 1/3 cup brown sugar
- 1/3 cup sherry vinegar
- 4 Tbsp. olive oil
Instructions:
- Place turkey, breast side up, on a cutting board and pat dry. Grip a wing and pull it outward so you can see where it attaches to the body. Using a sharp boning or chef’s knife, cut through the joint to separate the wing from the breast (if you hit bone, you’re in the wrong spot; pull the wing out farther to help you get into the place where the joint meets the socket). Remove the wing; repeat on the other side.
- Cut through skin connecting 1 leg to the carcass. Pull the leg back until the ball joint pops out of its socket; cut through the joint to separate the leg. Repeat on the other side.
- Now for the breast: Position the turkey breast side down with the opening facing you. Using kitchen shears, cut along one side of the backbone until you get all the way through the neck end, then turn the turkey 180° and cut through the other side to remove the backbone (save it for making stock).
- Very finely grind black and pink peppercorns in a spice mill or mortar and pestle; transfer to a medium bowl. Add salt, garlic powder, onion powder, brown sugar, and paprika, and use your fingers to mix them together.
- Place turkey pieces, skin side up, on a wire rack set inside a rimmed baking sheet. Sprinkle salt mixture liberally all over the turkey, patting to adhere. You may not need all of it, but it’s good to have extra since some will end up on the baking sheet. Chill the bird, uncovered, at least 24 hours and up to 2 days.
Glazing and assembly:
- Remove the turkey from the wire rack and rinse a baking sheet and rack if needed (the turkey will most likely release some liquid). Line a baking sheet with 3 layers of foil to make cleanup easy and set the rack back inside. Arrange turkey pieces on a rack, skin side up, and let sit at room temperature for 2–3 hours to help decrease the cooking time.
- Meanwhile, cook herbs, garlic, orange zest, soy sauce, brown sugar, and vinegar in a small saucepan over medium heat, stirring occasionally, until sugar is dissolved and the glaze thickens slightly (it should just barely coat a spoon), 10–12 minutes. Remove glaze from heat.
- Place a rack in the middle of the oven; preheat to 425°. Rub turkey with oil and pour 1 cup of water into the baking sheet. Roast turkey, rotating baking sheet halfway through until skin is mostly golden brown, 20–25 minutes. Reduce oven temperature to 300° and continue to roast turkey, brushing with glaze every 20 minutes and adding more water by ½-cupfuls as needed to maintain some liquid in the baking sheet, until an instant-read thermometer inserted into the thickest part of the breast registers 150°, and 170° when inserted into the thickest part of the thighs, 50–70 minutes longer (total cooking time will be 1–1½ hours). The skin should be deep golden brown and shiny. Transfer turkey to a cutting board; tent loosely with foil. Let rest for 30–60 minutes before carving.
Katie’s Homey Holiday Cookies
Katie has been making this cookie recipe with her mom for as long as she can remember. They spend one whole day baking an assortment of cookies, and a second day is dedicated to decorating them all. You can taste all the love they put into these cookies! This recipe was originally taken from The Joy of Cooking.
Ingredients:
The cookies:
- 1 cup unsalted butter, softened
- 2/3 cup of sugar
- 1 large egg
- 1/4 tsp. baking powder
- 1/8 tsp. of salt (double)
- 1 1/2 tsp. vanilla extract
- 2 1/3 cups of all-purpose flour
The frosting:
- 1 1/2 cups of powdered sugar (then add more)
- 1/4 stick of VERY soft butter
- 1 tsp of vanilla extract (add more to taste)
- pinch or two of salt
- Just enough hot water or milk to further soften the butter
Instructions:
- Using an electric mixer, beat the butter and sugar until VERY fluffy and well blended.
- Add and beat in the egg, baking powder, salt, and vanilla until evenly incorporated. Stir in flour until well blended and smooth.
- Divide the dough in half and shape it into circles. Place each circle between large sheets of wax paper. Roll out until ¼ inch thick, checking the underside and smoothing out any creases.
- Keeping the wax paper in place, layer the dough on a tray and refrigerate for 20-30 minutes, or until cold and slightly firm, but not hard.
- Preheat oven to 350 degrees and lightly grease cookie sheets
- Working with one portion of dough, gently peel away, and replace with 1 sheet of wax paper (this makes it easier to lift the cookies from the paper.)
- Cut out cookies and then use a wide spatula to transfer them from wax paper to cookie sheets, spacing them 1 inch apart.
- Bake 6-9 minutes until cookies are just slightly colored on top and slightly darker at the edges. Rotate sheets halfway through baking.
- Transfer sheets to wire racks and let cookies firm up for 1-2 minutes before transferring cookies to a wire rack to cool.
- Frost cookies as you see fit! Makes 3 dozen cookies.
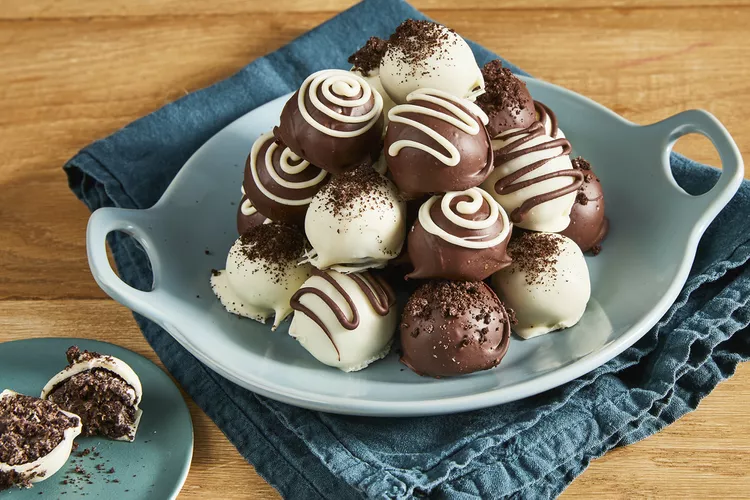
Becky’s Beautiful Oreo Cookie Balls
Becky’s whole family loves these Oreo Cookie Balls that she found on AllRecipes.com. They’re almost too pretty to eat, but don’t let that stop you!
Ingredients:
- 36 Oreo cookies, finely crushed
- 1 (8oz package) of cream cheese, softened
- 16oz of semi-sweet baking chocolate, melted
- Wax paper
Instructions:
- Mix crushed cookies and cream cheese in a large bowl until well-blended.
-
Use your hands to shape the mixture into 48 (1-inch) balls; place on a tray and freeze until thoroughly chilled, about 10 minutes.
-
Line a shallow pan with waxed paper. Dip balls in melted chocolate; place in a single layer on the prepared pan.
-
Refrigerate for 1 hour or until firm. Store in a covered container in the refrigerator. Makes 48 balls.
Sandra’s Dirty Holiday Martini
Out of all of us, Sandra has most closely cracked the code for a successful holiday evening with family… ALCOHOL! (photo was taken from Food Network.)
Ingredients:
- 2 1/2 oz top-shelf gin or vodka (Sandra prefers vodka)
- 1/2 oz dry vermouth
- 1/2 oz olive brine
- Garnish: 3 blue cheese olives (unstuffed olives work too)
Instructions:
- Mix the booze, brine, and a glass of ice in a stainless steel shaker.
- Shake, shake, then shake some more! Sandra recommends shaking for at least 45 seconds so the ice breaks apart and the drink becomes frothy.
- Strain and pour into a glass of your choosing.
- Enjoy!
Let us know if you try any of these delicious recipes in the comments section below. We’re wishing all of you the merriest of holidays in 2022 and hope these recipes help along the way!
Candor Threads has been celebrating companies through custom apparel since 1982. Contact us today and we can chat about all of the fun apparel we can develop for your group! Hello@CandorThreads.com

